- 세상의 모든 계산기 자유(질문) 게시판 팁 & 정보 ()
ROKU Streaming Stick+ 리모컨 배터리 광탈 issue
-

- 2021.02.05 - 20:28 2021.01.04 - 19:34 6416 5

유튜브 시청 전용으로 쓰고 있는 제품인데요.
(메뉴 등) 한글 지원은 안되지만, 유튜브 앱 자체적으로 한글 검색은 지원되어서 문제없이 잘 쓰고 있습니다.
다만 불편한 점이 하나 있는데...
(대기모드 말고 USB 전원이 빠졌거나, TV 코드가 빠졌거나) 스틱 전원이 완전 off 되고 한참 후에 보면, 리모컨 배터리가 광탈되어있더라구요.
전원이 빠진 본체와 연결을 계속 시도하는 것이 아닌가 추정이 되는데 정확한 것은 아직 파악중입니다.
이 문제에서 배터리 광탈을 막을 방법은
- 대기모드를 유지할 수 있게끔 전원을 관리하거나
(TV USB 전원 대신, 220V USB 전원 어댑터를 사용하는 것을 추천) - 리모컨 배터리를 빼 두거나...
-
25
댓글5
-
세상의모든계산기
전원 안꺼지게 했는데도 배터리 문제는 존재합니다.
며칠 수준은 아니지만 그래도 몇주 정도밖에 안가요.
검색해 보니 고질병인듯 합니다. 설계 오류 가능성이...
https://community.roku.com/t5/Remotes-Accessories/Enhanced-Remote-is-draining-batteries/td-p/511906/page/1쭉 읽어보니 해결 방법은 없구요.
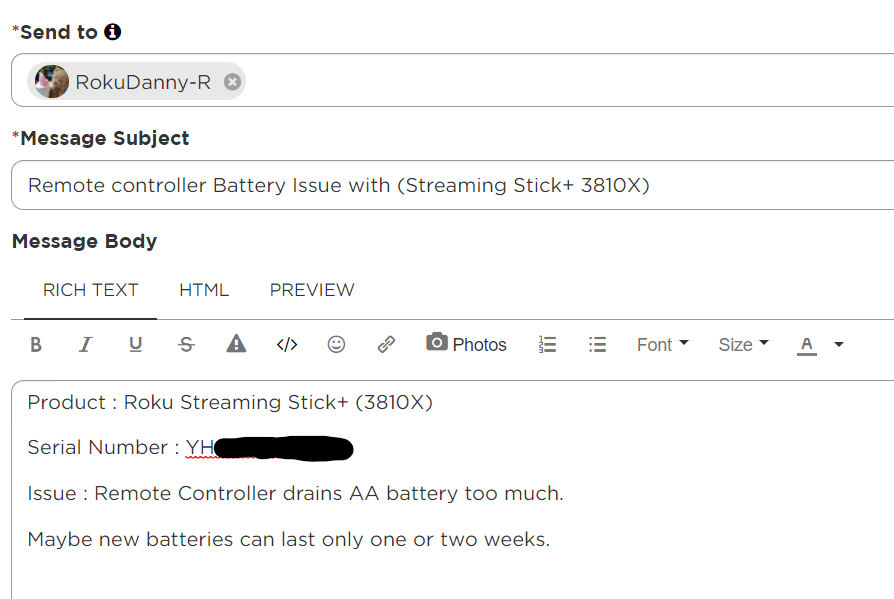
기기 정보 등을 관리자에게 PM으로 보내면 (문제없는) 리모콘을 새로 보내주는 듯 싶네요. -
-
세상의모든계산기2021.02.05 - 20:23 #32142
Hi,
Thank you for letting us know about the remote battery drain issue you are experiencing. Our engineering team has been investigating this issue closely and once more information is available I'll be sure to let the Community know.
In the meantime, if you are powering your Streaming Stick through the USB port on your TV, we would recommend that you power your Roku device through a wall outlet to see if that helps the issue you are experiencing.
Thanks,
Danny -
세상의모든계산기
ROKU 전원은
TV 뒷면 USB -----> 220V USB 어댑터로 변경하였습니다.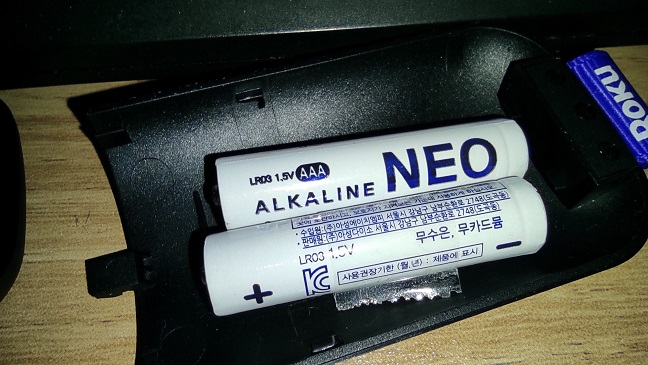
21-02-05, 20:50 : 1.582V
21-02-06, 20:09 : 1.576V
21-02-08, 01:32 : 1.568V
21-02-10, 08:00 : 1.557V & 배터리 OFF
-- 꺼진 상태 유지 --
21-02-13, 15:00 : 배터리 ON
21-02-14, 18:20 : 1.554V
21-02-16, 13:28 : 1.548V
21-02-19, 11:28 : 1.542V
(정전 한번 있었음. 정전 유지시간 알지 못함 30분 이내일 듯 한데...)
21-02-27, 12:40 : 1.528V
(ROKU 거의 사용 안함)
21-03-30, 07:40 : 1.432V(ROKU 사용 안함)
21-04-10, 21:03 : 1.479V (뭐지?? 저번에 잘 못 쟀나?)
** 중간 평가 : 별도의 (지속적, 안정적인) USB 전원에 연결하니 배터리 광탈하는 문제는 없음.
(ROKU 사용 거의 안함)
21-05-23, 16:00 : 1.457V
세상의모든계산기 님의 최근 댓글
뉴턴-랩슨 적분 방정식 시각화 v1.0 body { font-family: 'Pretendard', -apple-system, BlinkMacSystemFont, "Segoe UI", Roboto, Helvetica, Arial, sans-serif; display: flex; flex-direction: column; align-items: center; background: #f8f9fa; padding: 40px 20px; margin: 0; color: #333; } .container { background: white; padding: 40px; border-radius: 20px; box-shadow: 0 15px 35px rgba(0,0,0,0.08); max-width: 900px; width: 100%; } header { border-bottom: 2px solid #f1f3f4; margin-bottom: 30px; padding-bottom: 20px; } h1 { color: #1a73e8; margin: 0 0 10px 0; font-size: 1.8em; } p.subtitle { color: #5f6368; margin: 0; font-size: 1.1em; } .equation-box { background: #f1f3f4; padding: 15px; border-radius: 10px; text-align: center; margin-bottom: 30px; font-size: 1.3em; } canvas { border: 1px solid #e0e0e0; border-radius: 12px; background: #fff; width: 100%; height: auto; display: block; } .controls { margin-top: 30px; display: flex; gap: 15px; align-items: center; justify-content: center; flex-wrap: wrap; } button { padding: 12px 25px; border: none; border-radius: 8px; background: #1a73e8; color: white; cursor: pointer; font-weight: 600; font-size: 1em; transition: all 0.2s; box-shadow: 0 2px 5px rgba(26,115,232,0.3); } button:hover { background: #1557b0; transform: translateY(-1px); box-shadow: 0 4px 8px rgba(26,115,232,0.4); } button:active { transform: translateY(0); } button.secondary { background: #5f6368; box-shadow: 0 2px 5px rgba(0,0,0,0.2); } button.secondary:hover { background: #4a4e52; } .status-badge { background: #e8f0fe; color: #1967d2; padding: 8px 15px; border-radius: 20px; font-weight: bold; font-size: 0.9em; } .explanation { margin-top: 40px; padding: 25px; background: #fff8e1; border-left: 5px solid #ffc107; border-radius: 8px; line-height: 1.8; } .explanation h3 { margin-top: 0; color: #856404; } .math-symbol { font-family: 'Times New Roman', serif; font-style: italic; font-weight: bold; color: #d93025; } .code-snippet { background: #202124; color: #e8eaed; padding: 2px 6px; border-radius: 4px; font-family: monospace; } 📊 Newton-Raphson 적분 방정식 시뮬레이터 미분적분학의 기본 정리(FTC)를 이용한 수치해석 시각화 목표 방정식: ∫₀ᴬ (2√x) dx = 20 을 만족하는 A를 찾아라! 계산 시작 (A 추적) 초기화 현재 반복: 0회 💡 시각적 동작 원리 (Newton-Raphson & FTC) Step 1 (오차 측정): 현재 A까지 쌓인 파란색 면적이 목표치(20)와 얼마나 차이나는지 계산합니다. Step 2 (FTC의 마법): 면적의 변화율(미분)은 그 지점의 그래프 높이 f(A)와 같습니다. Step 3 (보정): 다음 A = 현재 A - (면적 오차 / 현재 높이) 공식을 사용하여 A를 이동시킵니다. 결론: 오차를 현재 높이로 나누면, 오차를 메우기 위해 필요한 가로 길이(ΔA)가 나옵니다. 이 과정을 반복하면 정답에 도달합니다! const canvas = document.getElementById('graphCanvas'); const ctx = canvas.getContext('2d'); const iterText = document.getElementById('iterText'); // 수학 설정 const targetArea = 20; const f = (x) => Math.sqrt(x) * 2; // 피적분 함수 f(x) = 2√x const F = (x) => (4/3) * Math.pow(x, 1.5); // 정적분 결과 F(x) = ∫ 2√x dx = 4/3 * x^(3/2) let A = 1.5; // 초기값 let iteration = 0; let animating = false; // 그래프 드로잉 설정 const scale = 50; const offsetX = 60; const offsetY = 380; function drawGrid() { ctx.strokeStyle = '#f1f3f4'; ctx.lineWidth = 1; ctx.beginPath(); for(let i=0; i 2026 04.11 참값 : A = ±2√5 근사값 : A≈±4.472135954999579392818347 2026 04.10 fx-570 ES 입력 결과 초기값 입력 반복 수식 입력 반복 결과 2026 04.10 파이썬 코드 검증 결과 초기값: 5.0 반복 1회차: 4.5000000000 반복 2회차: 4.4722222222 반복 3회차: 4.4721359558 반복 4회차: 4.4721359550 반복 5회차: 4.4721359550 초기값: 10.0 반복 1회차: 6.0000000000 반복 2회차: 4.6666666667 반복 3회차: 4.4761904762 반복 4회차: 4.4721377913 반복 5회차: 4.4721359550 2026 04.10 감사합니다. 주말 잘 보내세요. 2026 03.06