- 세상의 모든 계산기 자유(질문) 게시판 팁 & 정보 ()
(프로그램) 계산기 폰트를 이미지로 저장하는 python 프로그램
-

- 2024.06.28 - 17:19 2024.06.26 - 08:43 2880 4
import os
import tkinter as tk
from tkinter import filedialog
from PIL import Image, ImageDraw, ImageFont
from fontTools.ttLib import TTFont

def create_character_images(font_path, output_folder, output_height=32):
    # 폰트 파일 로드
    font_size = output_height * 2  # 초기 폰트 크기를 출력 높이의 2배로 설정
    font = ImageFont.truetype(font_path, font_size)
    ttfont = TTFont(font_path)

    # 출력 폴더 생성
    os.makedirs(output_folder, exist_ok=True)

    # 폰트에서 사용 가능한 모든 문자 추출
    characters = set()
    for table in ttfont['cmap'].tables:
        for char_code, char_name in table.cmap.items():
            if char_code < 0x10000:  # Unicode 범위 내의 문자만 처리
                characters.add(chr(char_code))

    # 각 문자에 대해 이미지 생성
    for char in characters:
        # 문자의 크기 측정
        left, top, right, bottom = font.getbbox(char)
        width = max(1, right - left)
        height = max(1, bottom - top)

        # 여유 공간 추가
        padding = font_size // 20  # 폰트 크기의 5%를 패딩으로 사용
        width += padding * 2
        height += padding * 2

        # 이미지 생성
        img = Image.new('RGBA', (width, height), (255, 255, 255, 0))
        draw = ImageDraw.Draw(img)

        # 문자 그리기
        draw.text((padding - left, padding - top), char, font=font, fill=(0, 0, 0, 255))

        # 여백 제거
        bbox = img.getbbox()
        if bbox:
            img = img.crop(bbox)
        else:
            continue  # 빈 이미지인 경우 건너뛰기

        # 높이를 32픽셀로 조정하면서 비율 유지
        if img.height > 0:
            new_height = output_height
            new_width = max(1, int(img.width * (new_height / img.height)))
            img = img.resize((new_width, new_height), Image.LANCZOS)
        else:
            continue  # 높이가 0인 경우 건너뛰기

        # 이미지 저장
        filename = f"{ord(char):04X}.png"
        img.save(os.path.join(output_folder, filename))

    print(f"{output_folder}에 생성된 이미지: {len(characters)}개")

# 파일 선택 대화상자 표시
root = tk.Tk()
root.withdraw()  # 기본 창 숨기기
font_path = filedialog.askopenfilename(
    title="폰트 파일 선택",
    filetypes=[("TrueType Font", "*.ttf"), ("All Files", "*.*")]
)

if font_path:
    # 출력 폴더 생성
    font_dir = os.path.dirname(font_path)
    font_name = os.path.splitext(os.path.basename(font_path))[0]
    output_folder = os.path.join(font_dir, font_name)

    create_character_images(font_path, output_folder, output_height=32)
else:
    print("폰트 파일이 선택되지 않았습니다.")
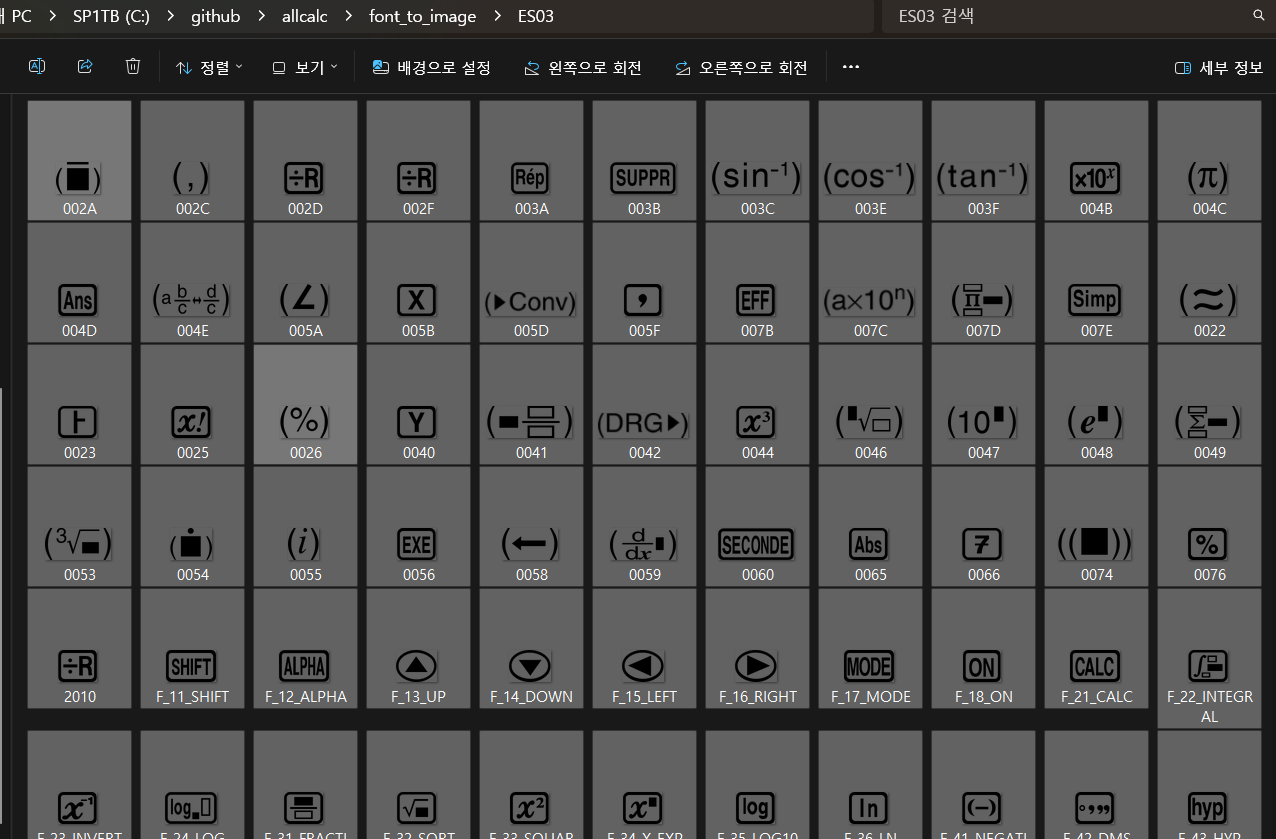
1. 실행
2. .ttf 폰트 파일 선택
3. 선택한 폰트 파일이 있는 곳 아래에 폰트파일명의 폴더가 생성됨
4. 폰트 이미지가 png 파일로 저장됨 : 배경(background) 없음.
-
25
댓글4
-
세상의모든계산기
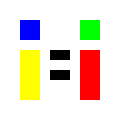
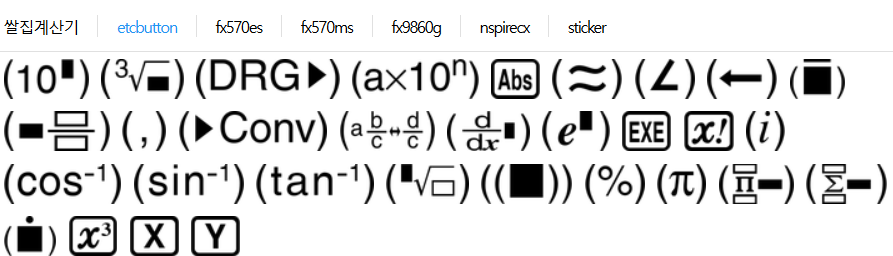
버튼 안쪽은 색이 칠해지는게 좋을 것 같기도 한데...
일단은 이걸로 만족합니다.
예전에 폰트 설치하고,
문서 보면서
-> 포토샵에서 키 하나씩 눌러가며 이미지 만들고
-> 크기 맞춰서 저장하고
-> 또 리사이즈하고
하나하나 삽질하면서 만들었던 기억이 나는데
인공지능 시대가 좋네요.
프로그램 찾는 것보다도 빠르게 맞춤형으로 만들어주니...
* 사이트에 올릴 때는 파일명 순서로 나와서,
계산기 버튼 배치에 맞게 파일명은 노가다로 수정해 주어야 합니다.
-
세상의모든계산기 님의 최근 댓글
뉴턴-랩슨 적분 방정식 시각화 v1.0 body { font-family: 'Pretendard', -apple-system, BlinkMacSystemFont, "Segoe UI", Roboto, Helvetica, Arial, sans-serif; display: flex; flex-direction: column; align-items: center; background: #f8f9fa; padding: 40px 20px; margin: 0; color: #333; } .container { background: white; padding: 40px; border-radius: 20px; box-shadow: 0 15px 35px rgba(0,0,0,0.08); max-width: 900px; width: 100%; } header { border-bottom: 2px solid #f1f3f4; margin-bottom: 30px; padding-bottom: 20px; } h1 { color: #1a73e8; margin: 0 0 10px 0; font-size: 1.8em; } p.subtitle { color: #5f6368; margin: 0; font-size: 1.1em; } .equation-box { background: #f1f3f4; padding: 15px; border-radius: 10px; text-align: center; margin-bottom: 30px; font-size: 1.3em; } canvas { border: 1px solid #e0e0e0; border-radius: 12px; background: #fff; width: 100%; height: auto; display: block; } .controls { margin-top: 30px; display: flex; gap: 15px; align-items: center; justify-content: center; flex-wrap: wrap; } button { padding: 12px 25px; border: none; border-radius: 8px; background: #1a73e8; color: white; cursor: pointer; font-weight: 600; font-size: 1em; transition: all 0.2s; box-shadow: 0 2px 5px rgba(26,115,232,0.3); } button:hover { background: #1557b0; transform: translateY(-1px); box-shadow: 0 4px 8px rgba(26,115,232,0.4); } button:active { transform: translateY(0); } button.secondary { background: #5f6368; box-shadow: 0 2px 5px rgba(0,0,0,0.2); } button.secondary:hover { background: #4a4e52; } .status-badge { background: #e8f0fe; color: #1967d2; padding: 8px 15px; border-radius: 20px; font-weight: bold; font-size: 0.9em; } .explanation { margin-top: 40px; padding: 25px; background: #fff8e1; border-left: 5px solid #ffc107; border-radius: 8px; line-height: 1.8; } .explanation h3 { margin-top: 0; color: #856404; } .math-symbol { font-family: 'Times New Roman', serif; font-style: italic; font-weight: bold; color: #d93025; } .code-snippet { background: #202124; color: #e8eaed; padding: 2px 6px; border-radius: 4px; font-family: monospace; } 📊 Newton-Raphson 적분 방정식 시뮬레이터 미분적분학의 기본 정리(FTC)를 이용한 수치해석 시각화 목표 방정식: ∫₀ᴬ (2√x) dx = 20 을 만족하는 A를 찾아라! 계산 시작 (A 추적) 초기화 현재 반복: 0회 💡 시각적 동작 원리 (Newton-Raphson & FTC) Step 1 (오차 측정): 현재 A까지 쌓인 파란색 면적이 목표치(20)와 얼마나 차이나는지 계산합니다. Step 2 (FTC의 마법): 면적의 변화율(미분)은 그 지점의 그래프 높이 f(A)와 같습니다. Step 3 (보정): 다음 A = 현재 A - (면적 오차 / 현재 높이) 공식을 사용하여 A를 이동시킵니다. 결론: 오차를 현재 높이로 나누면, 오차를 메우기 위해 필요한 가로 길이(ΔA)가 나옵니다. 이 과정을 반복하면 정답에 도달합니다! const canvas = document.getElementById('graphCanvas'); const ctx = canvas.getContext('2d'); const iterText = document.getElementById('iterText'); // 수학 설정 const targetArea = 20; const f = (x) => Math.sqrt(x) * 2; // 피적분 함수 f(x) = 2√x const F = (x) => (4/3) * Math.pow(x, 1.5); // 정적분 결과 F(x) = ∫ 2√x dx = 4/3 * x^(3/2) let A = 1.5; // 초기값 let iteration = 0; let animating = false; // 그래프 드로잉 설정 const scale = 50; const offsetX = 60; const offsetY = 380; function drawGrid() { ctx.strokeStyle = '#f1f3f4'; ctx.lineWidth = 1; ctx.beginPath(); for(let i=0; i 2026 04.11 참값 : A = ±2√5 근사값 : A≈±4.472135954999579392818347 2026 04.10 fx-570 ES 입력 결과 초기값 입력 반복 수식 입력 반복 결과 2026 04.10 파이썬 코드 검증 결과 초기값: 5.0 반복 1회차: 4.5000000000 반복 2회차: 4.4722222222 반복 3회차: 4.4721359558 반복 4회차: 4.4721359550 반복 5회차: 4.4721359550 초기값: 10.0 반복 1회차: 6.0000000000 반복 2회차: 4.6666666667 반복 3회차: 4.4761904762 반복 4회차: 4.4721377913 반복 5회차: 4.4721359550 2026 04.10 감사합니다. 주말 잘 보내세요. 2026 03.06